Prerequisites:
Aws account
Jenkins account
Domain name
Github account
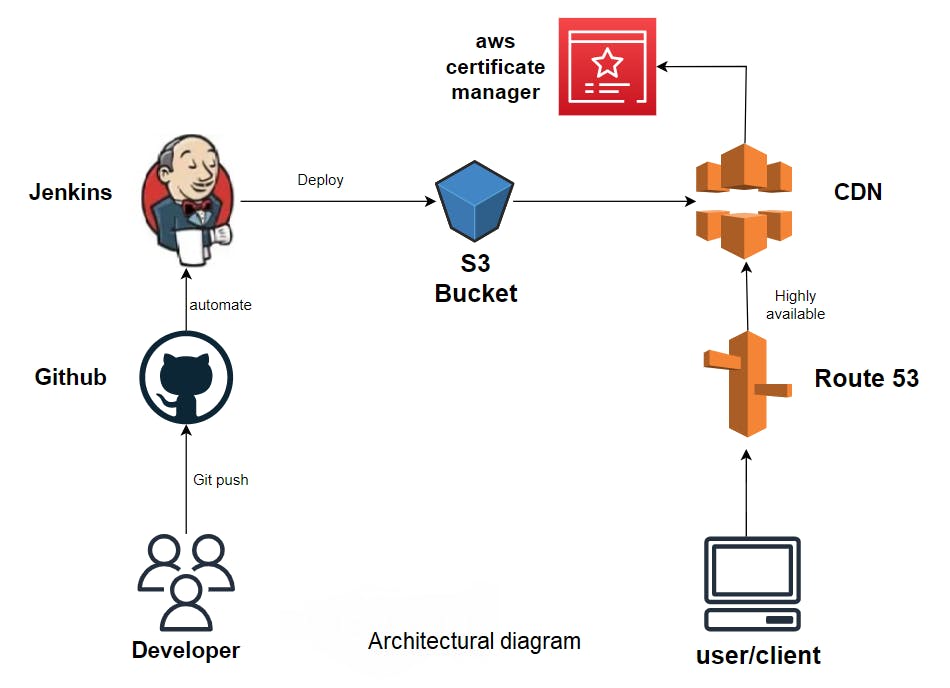
Hey guys,Today we gonna host a static website on Amazon S3 using one of the CI/CD tools , here i'm using jenkins and you can use any pipeline, Basically pipeline is used to automate and integrate
Overview:
The user who wants to access the website hit the dns (i'm using Domain.com) which redirects to cloud front(i'm using CDN) and to store the files we're using s3 here and s3 is accessible only using cloud front ,so here user cannot directly access the bucket and to make the connection secure i'm using ACM certificate and to automate we're hosting the code on Github and it triggers the pipeline(Automation) and pipeline deploys the code to s3 bucket
steps:
Step1: Create bucket:
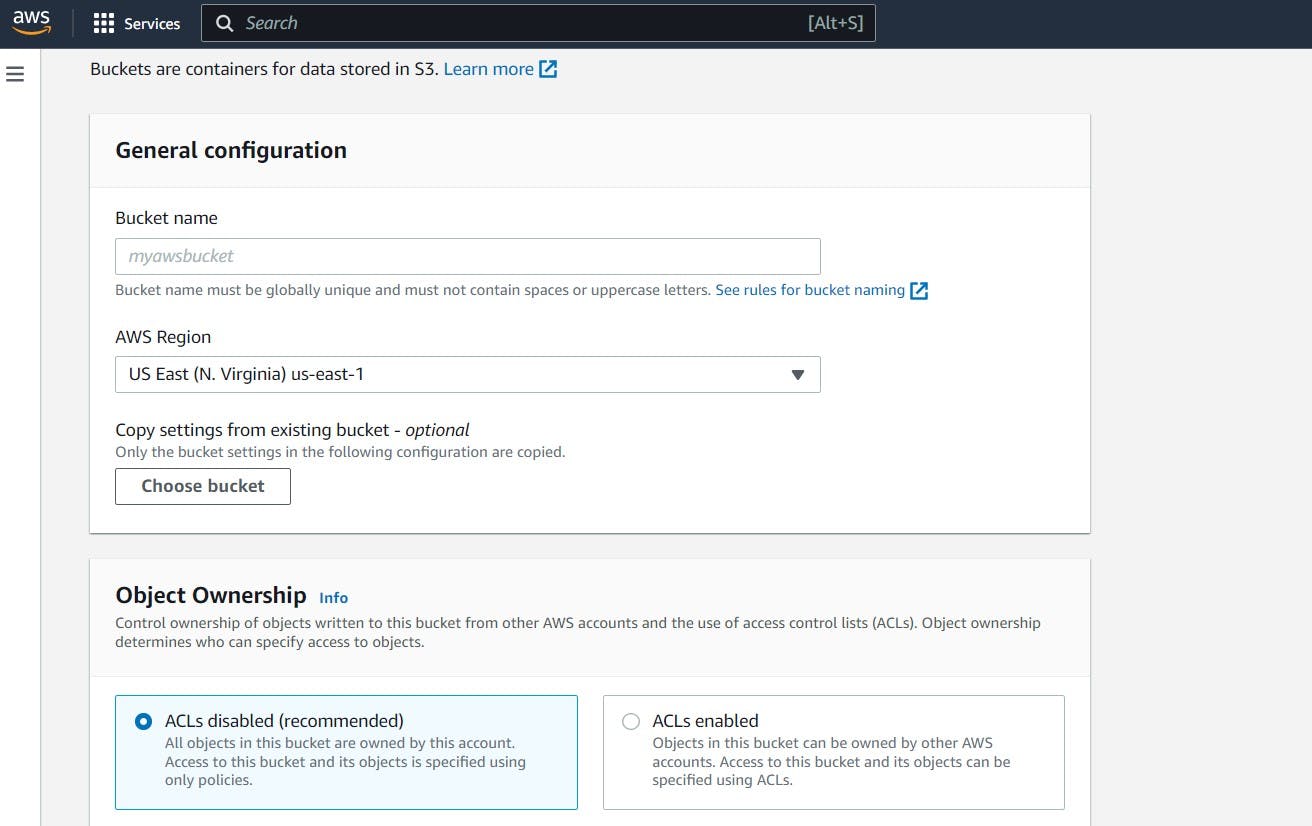
I had given Bucketname as manogna.tech and region is default , we kept everything default
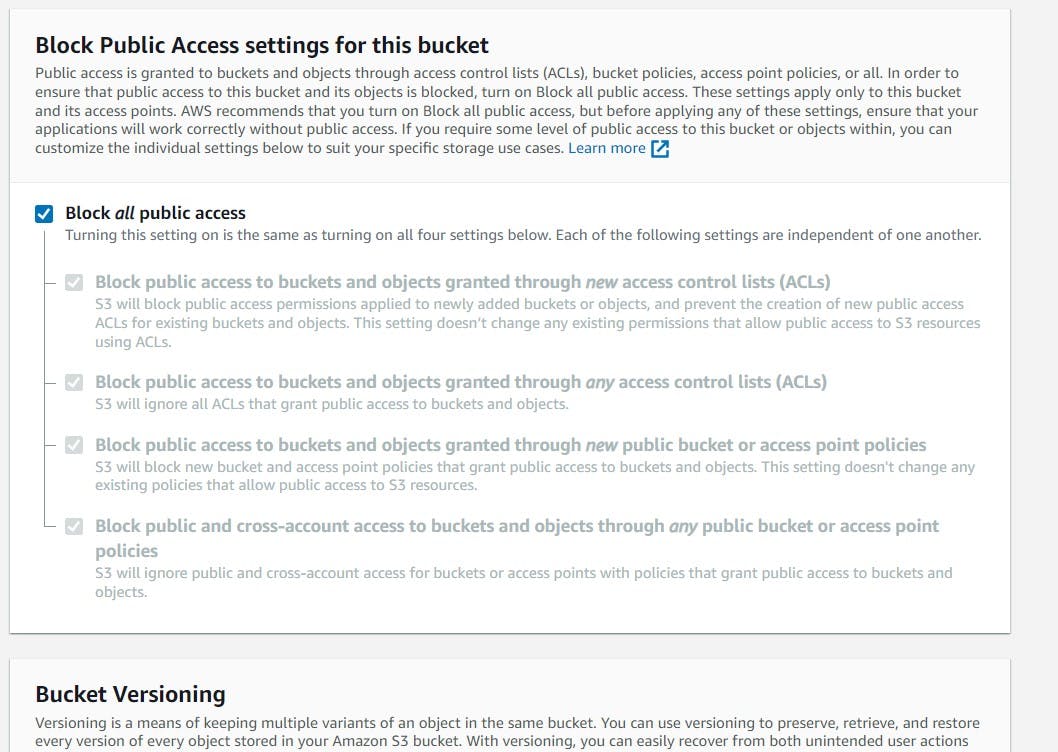
Block all public access and create bucket
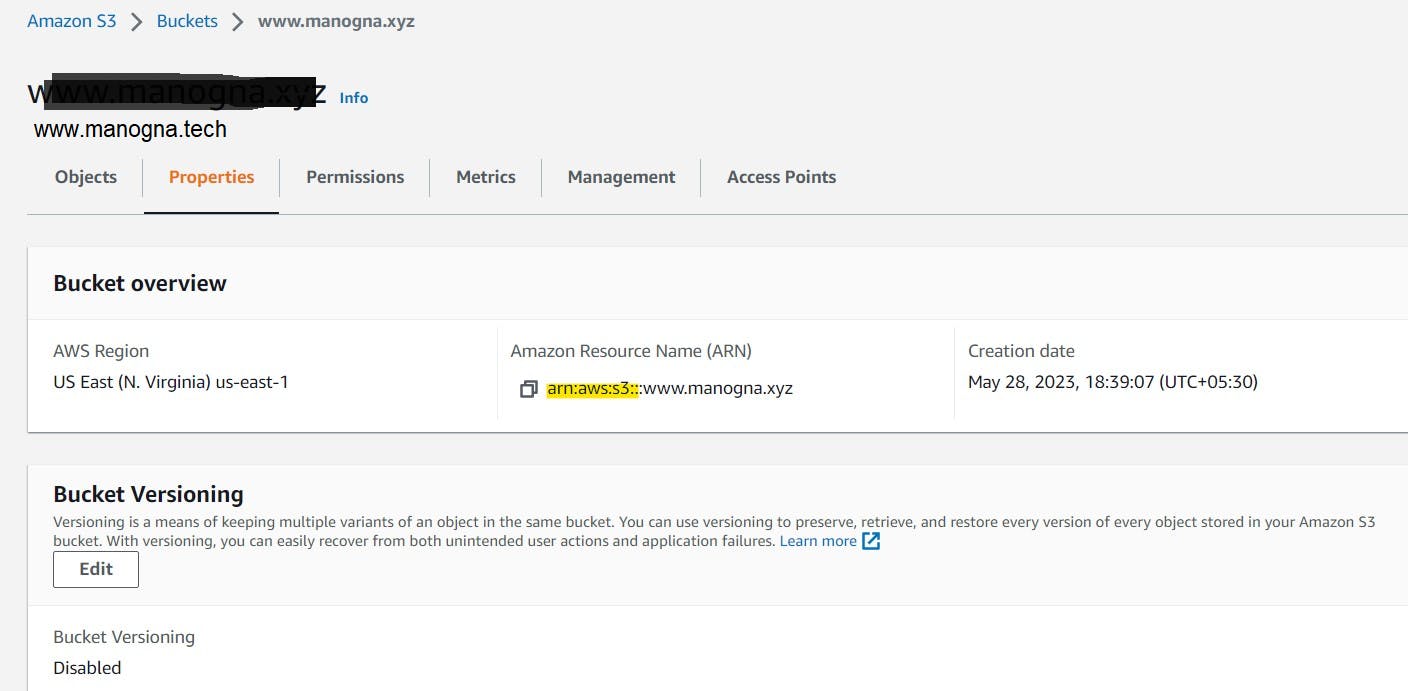
scroll down to the bottom and you find static website hosting and edit and make it enable
Index document: index.html
Error document: error.html and save changes
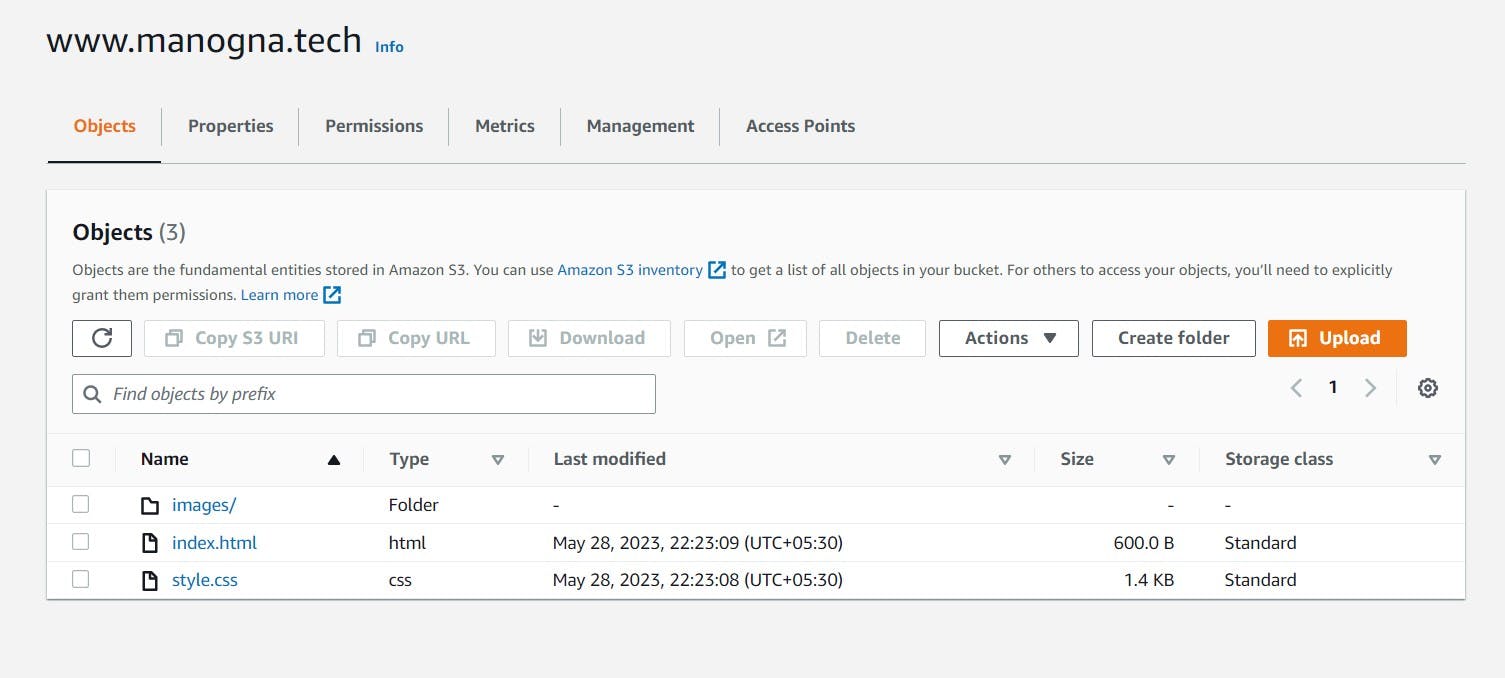
step 2 : upload all the files and click upload now got to properties again and click on the link
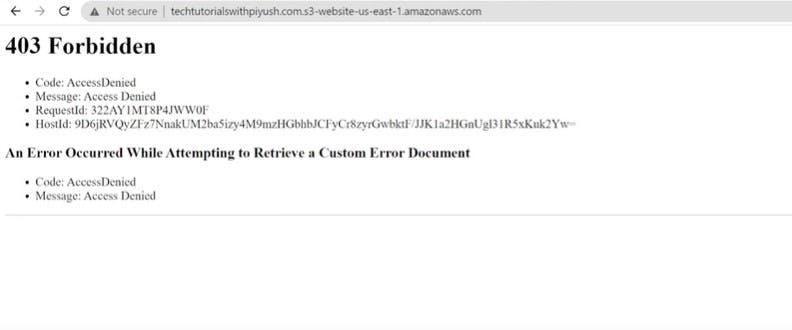
you get error like this
**step 3:**Search for cloudfront and click on create cloudfront distribution
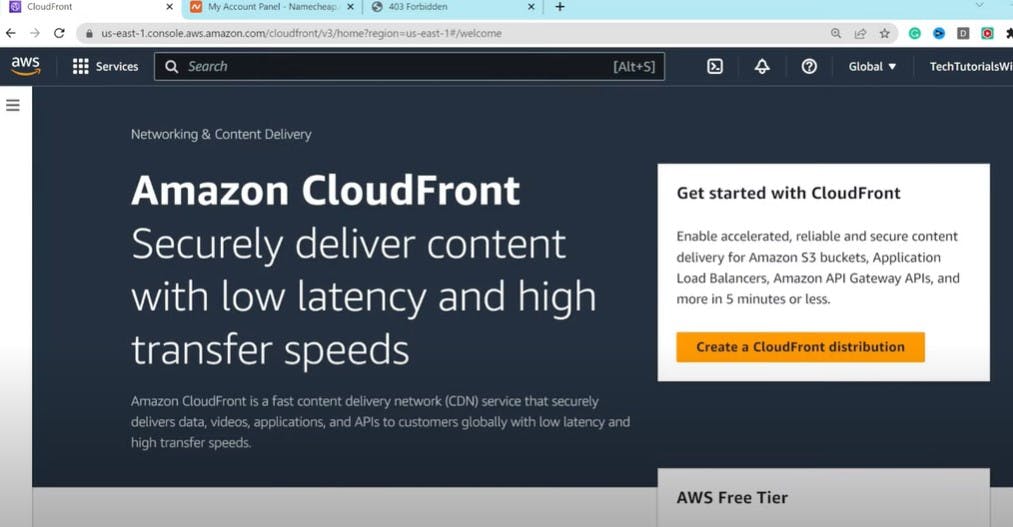
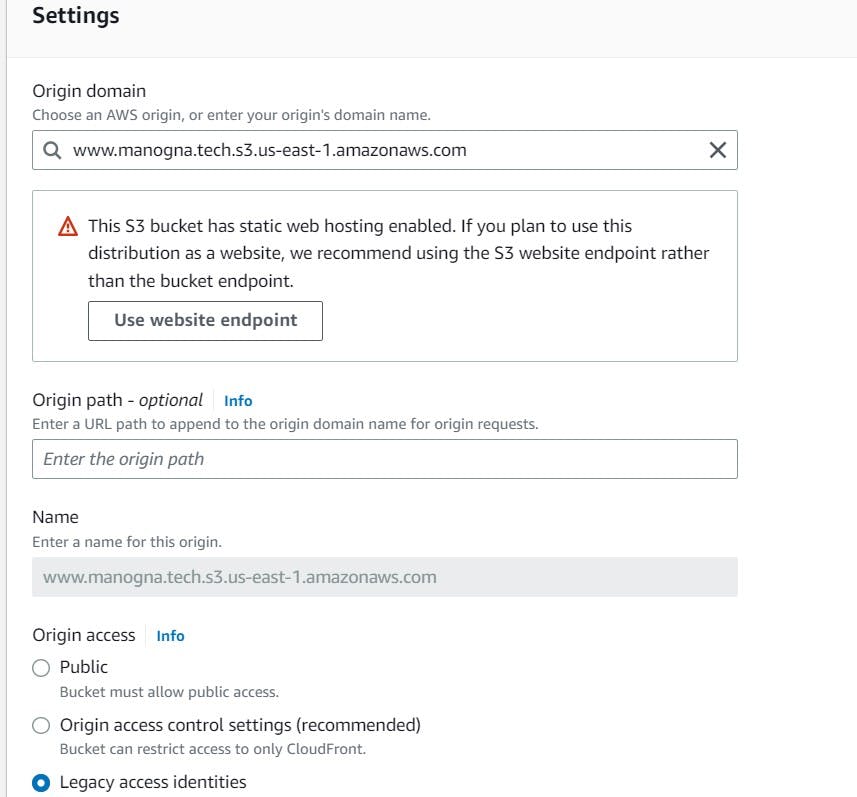
choose origin domain and origin access is legacy to enable the origin access identity and select create new OAI and click on create , this identity is kind of access to the bucket which will not be accessible anywhere else and select yes,update the bucket policy
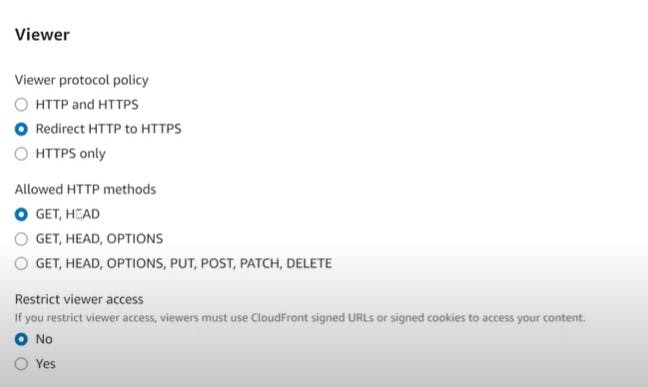
select the above options and whatever i don't mention keep it as it is
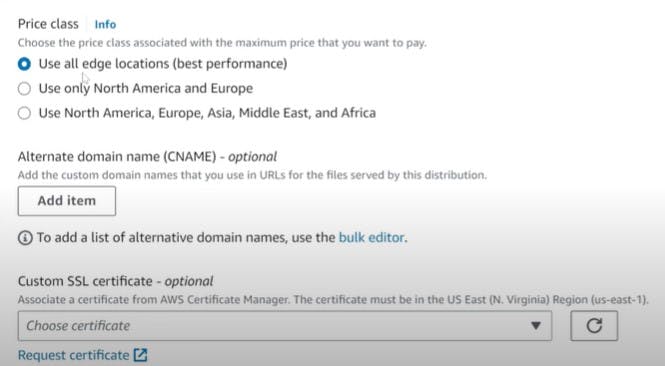
use all edge location and add alternate domain name as manogna.tech ,click on request certificate, to get our traffic encrypted we installing certificate *certificate must be in US East (N.Virginia) otherwise certificate won't work
step 4: go on the default ones
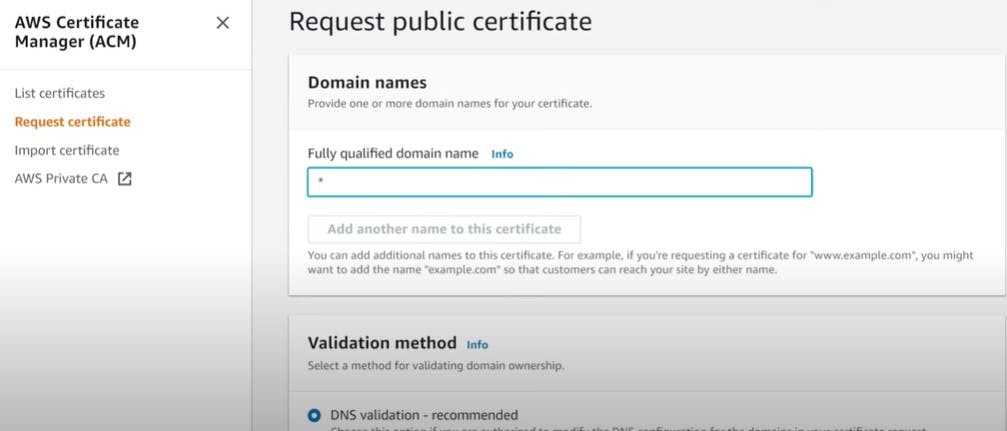
put *.manogna.tech in domain name and hit request and it shows validation is pending
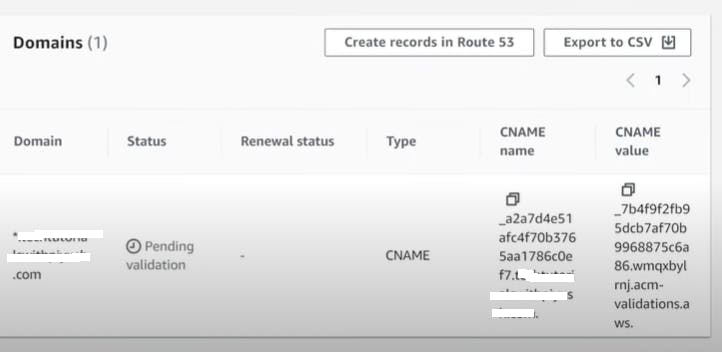
It populates CNAME and it's value copy cname till fullstop also copy CNAME value don't copy . after aws , Be careful
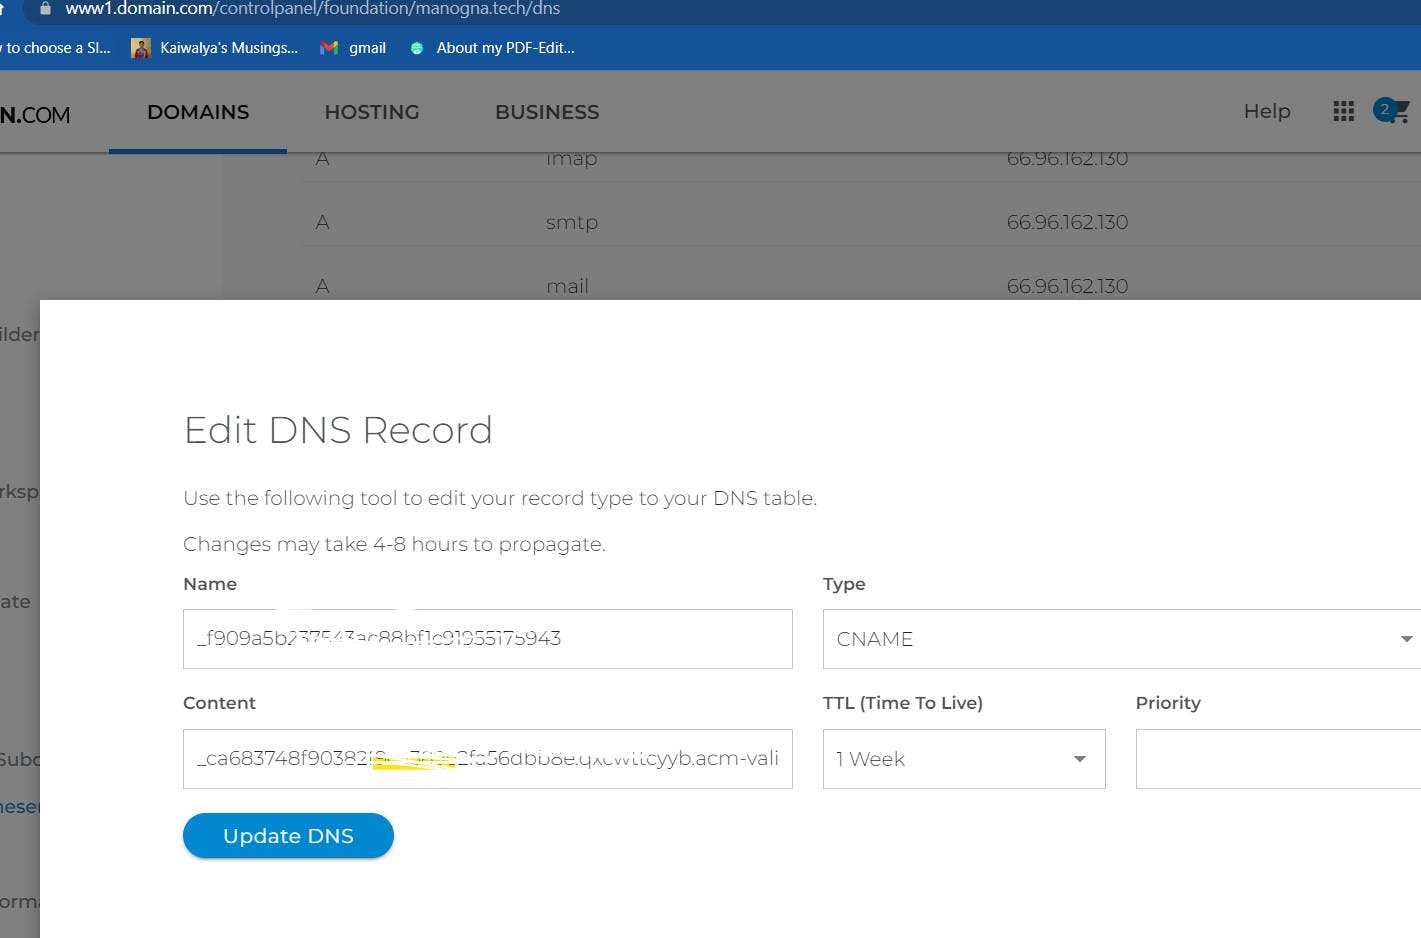
paste them in the Domain.com website and it could take some times
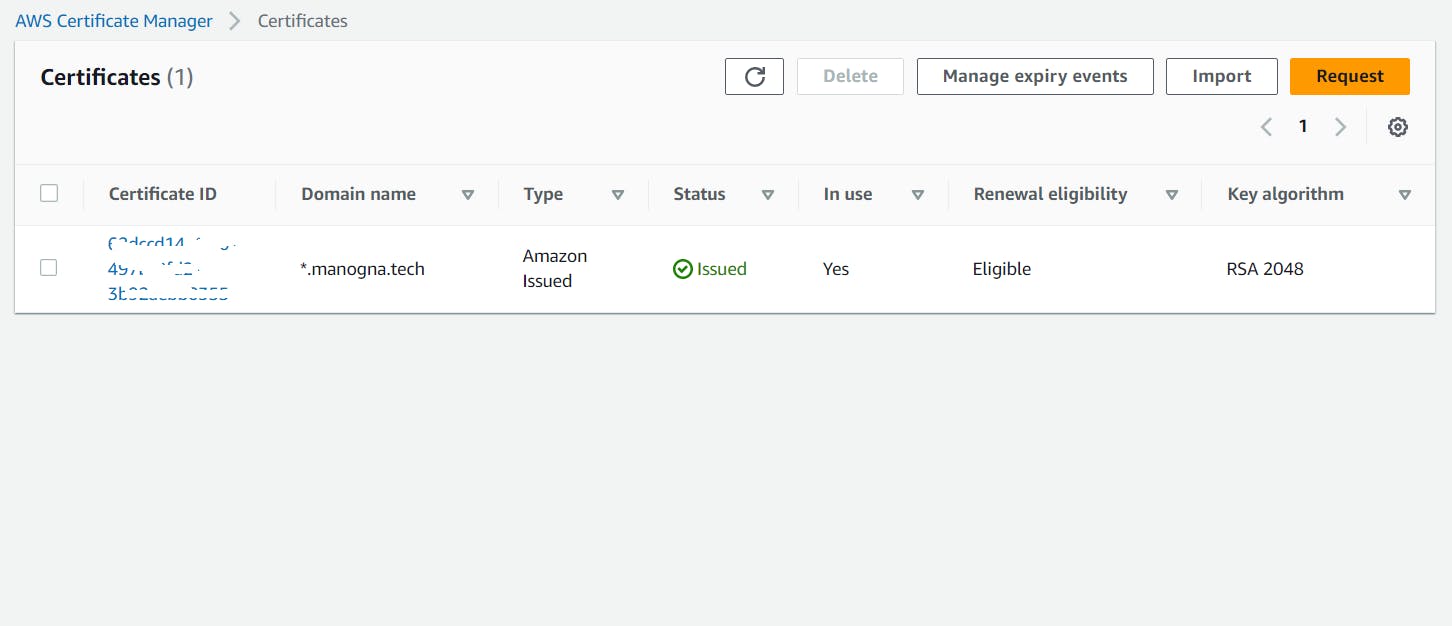
you get issued, now select this certficate and keep everything as default ,choose index.html as Default root object and create distribution with WAF enabled after some time you get like this

copy domain name paste in new tab,Ta-da you get to see the static website
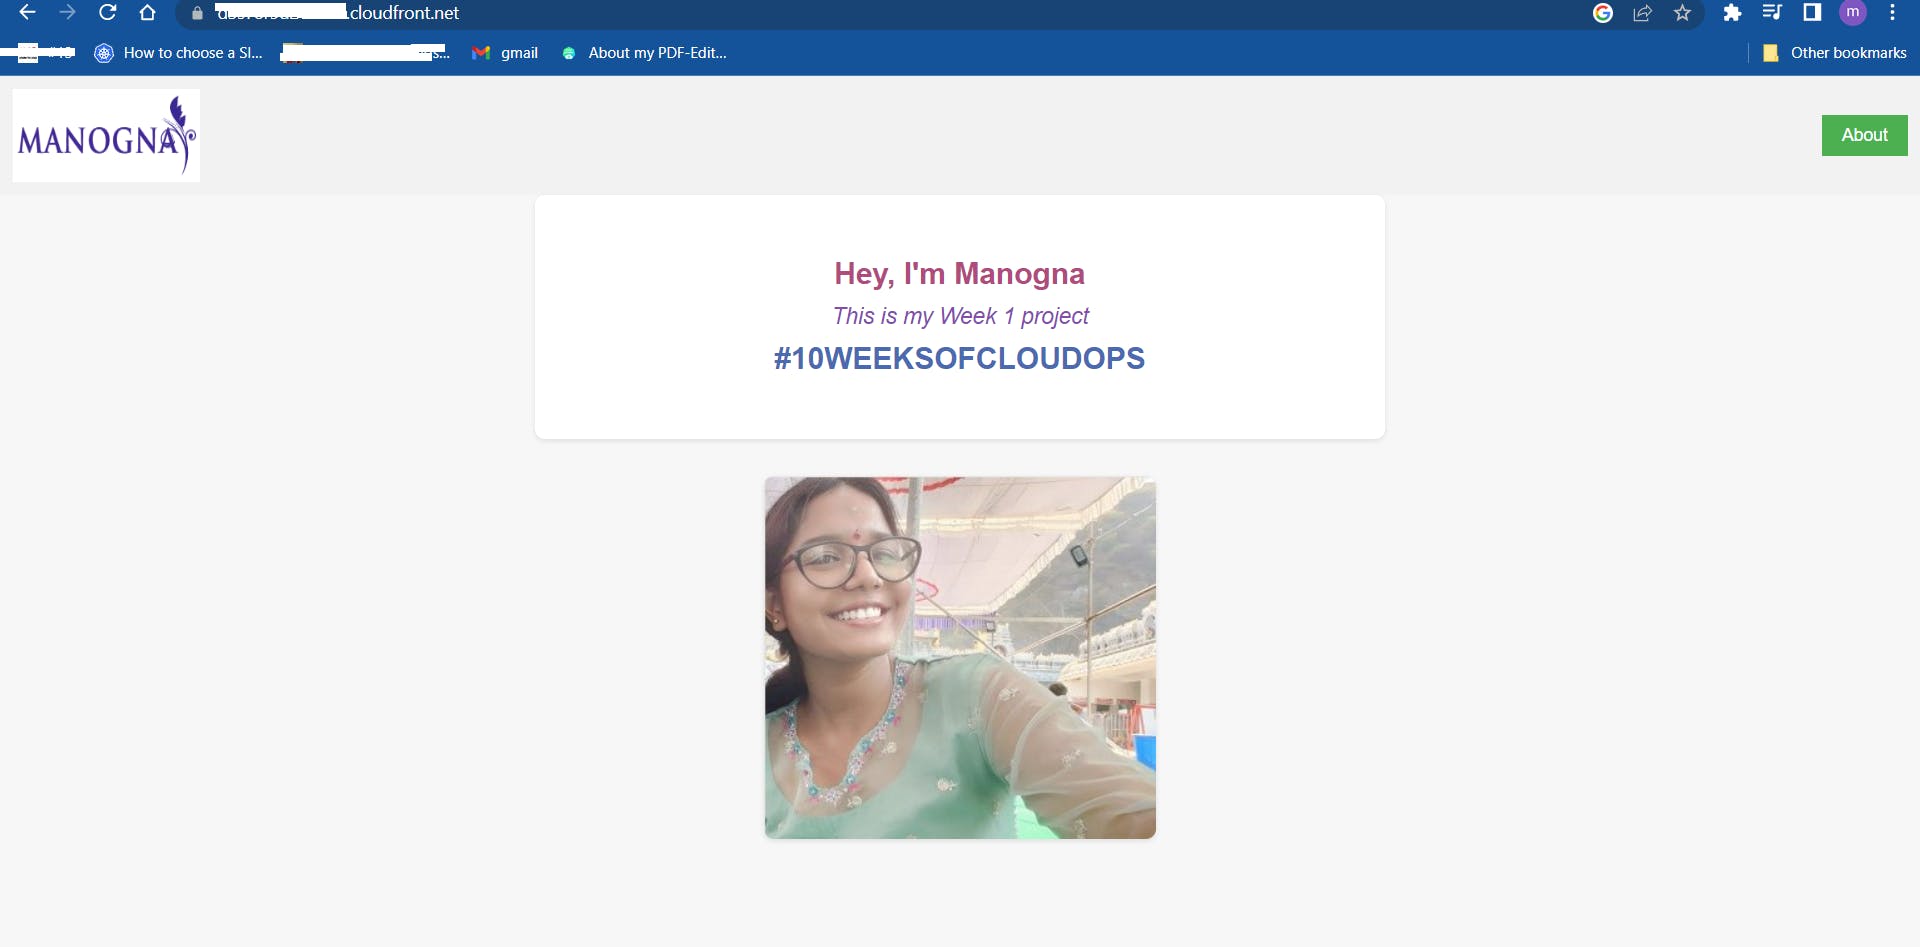
Step 5: Go to s3 again and tap on permissions scroll down a little bit and bucket policy created for you, It was created automatically when we enabled the cloudfront distribution
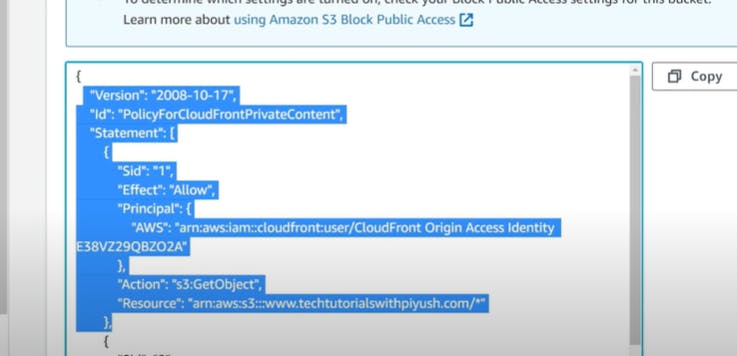
and till now we have been accessing using cloudfront , now let's redirect it to custom domain
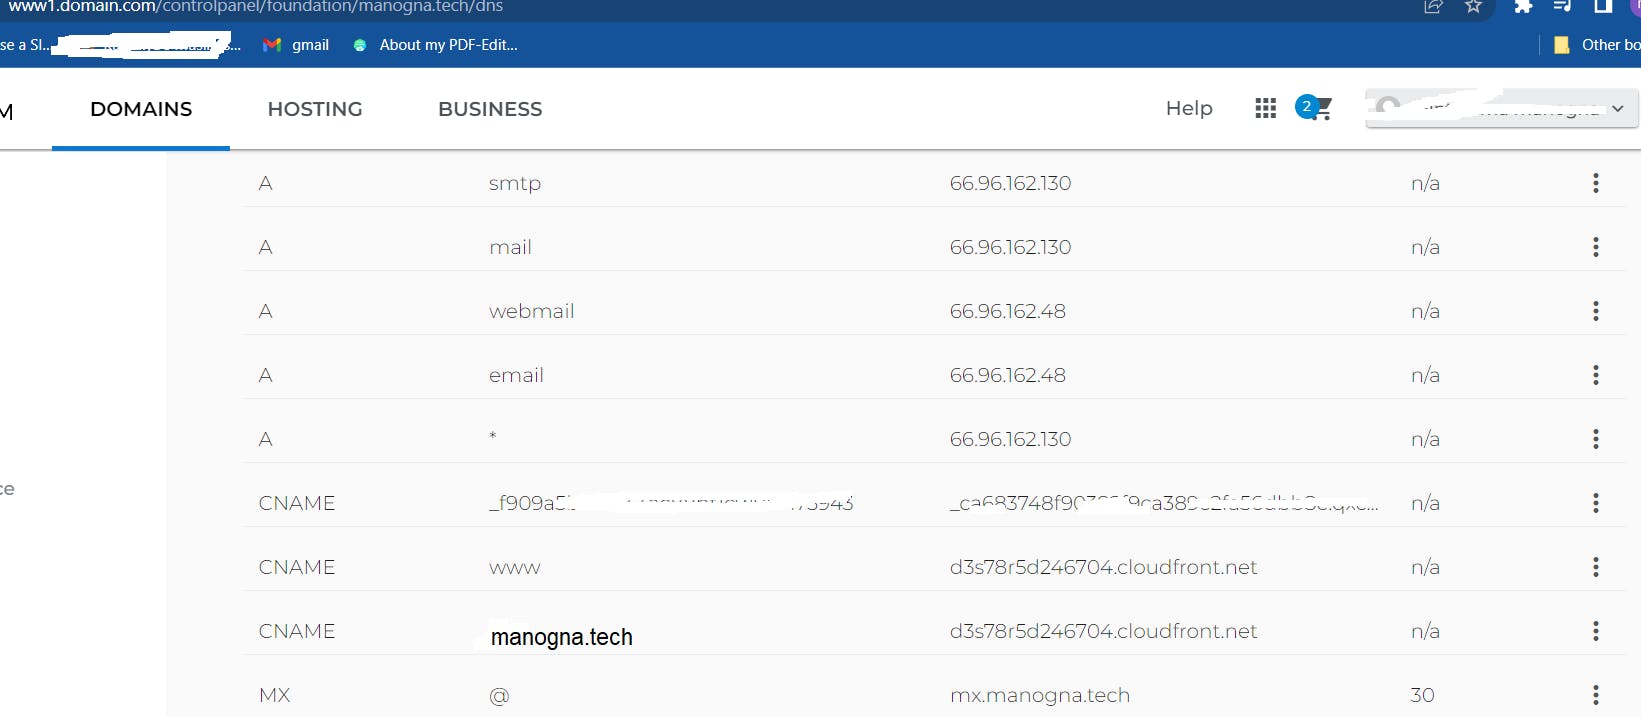
do the changes mentioned in the picture,I did it in domain.com and after waiting some time , my website called manogna.tech is accessible with my custom domain and now let's automate
Step 6 :
CI/CD means Continuous Integration and continuous delivery , by using CI/CD the main purpose is to automate and integrate, so now let's start it, here I'm using jenkins as the pipeline
1.first i'm setting up an EC2-Instance with os as ubuntu and after that https://pkg.jenkins.io/debian-stable/ and click on ubuntu/Debian and do all the neccesary steps mentioned in the link.
2.After you done till sudo apt-get install jenkins here which was mentioned in the link now try checking in the google give yourpublicip:8080, then do the neccesary configurations like authencating and registering in jenkins and then your good to go and start using Jenkins.
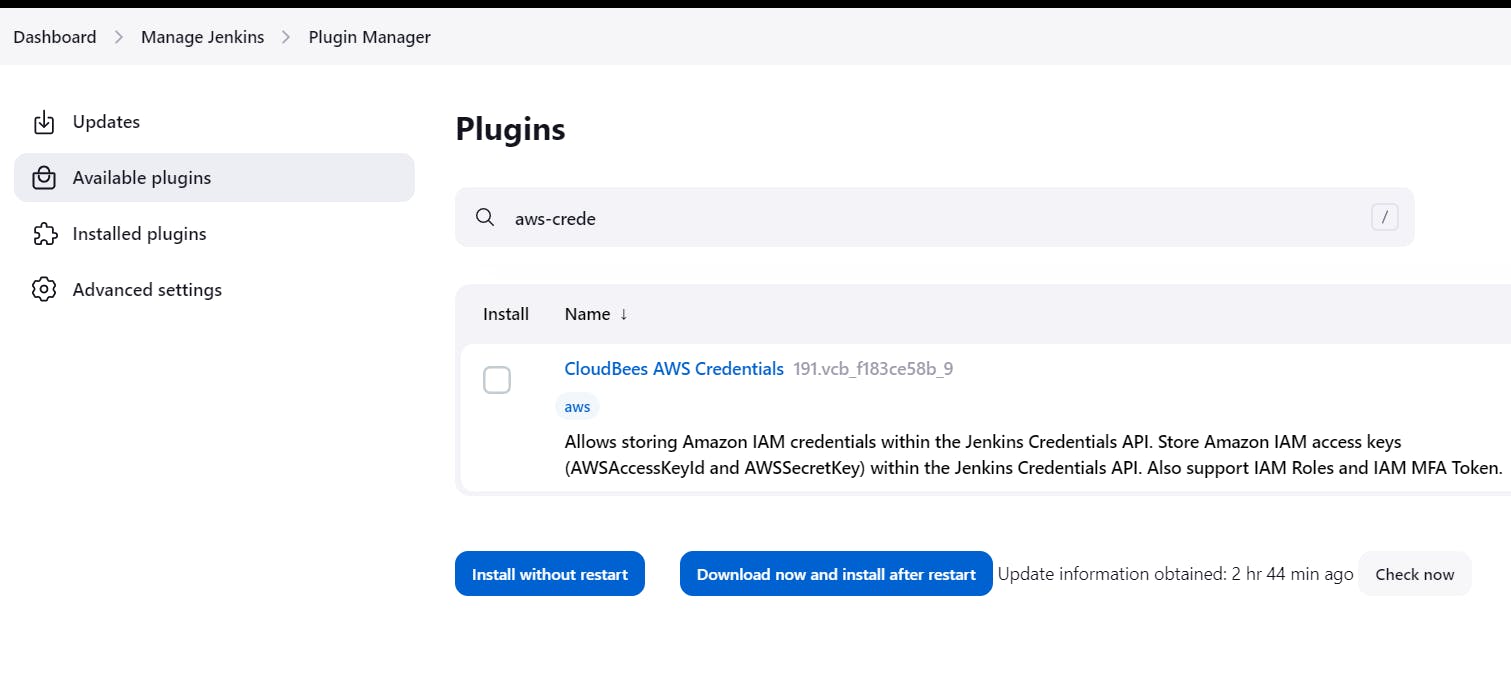
Install the above plugin as we are integrating with aws ,then go to credentials , add credentials in the global .create an IAM user with the S3Fullaccess policy , This IAM user now will be using to configure credentials in Jenkins
Note: also make sure to create access key secret key steps for that is User----->security credentials ----->create a access key
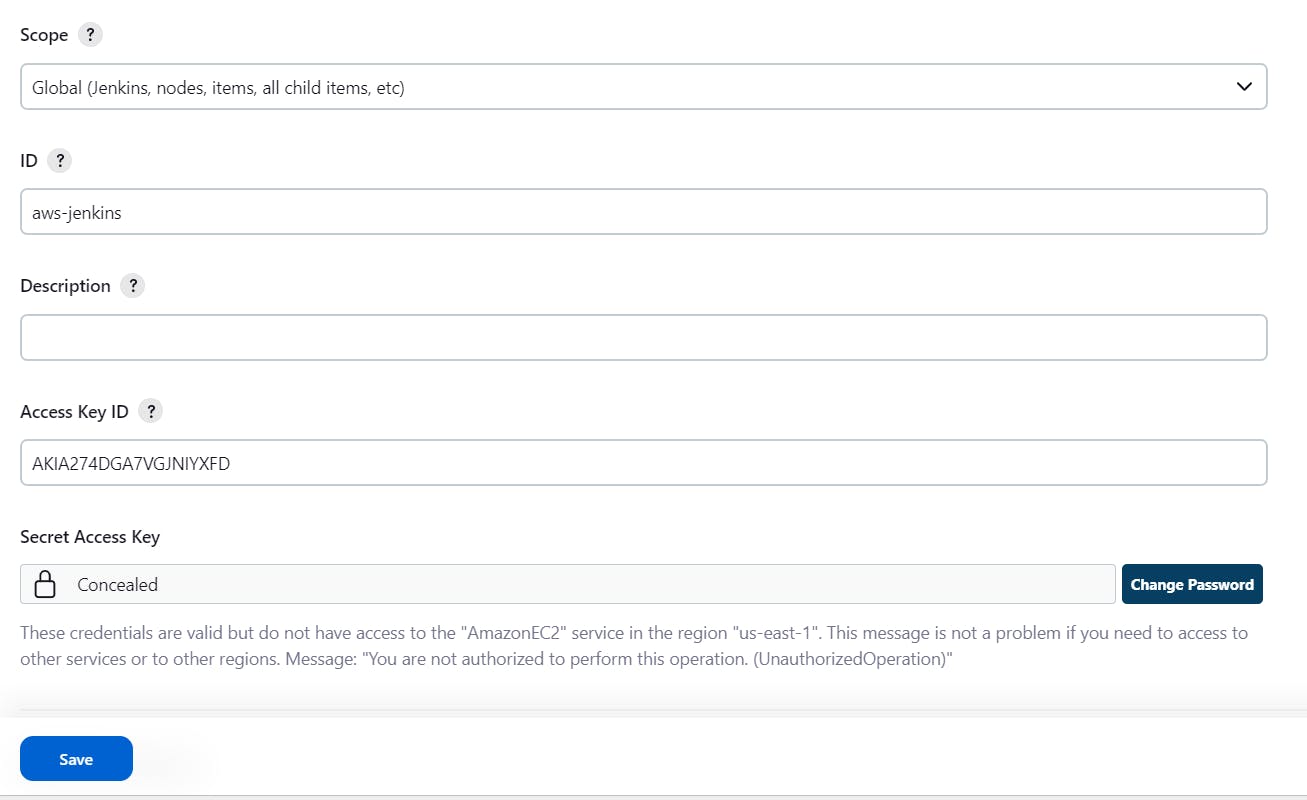
Now got to github

All the files are related to my website, Jenkinsfile is the default file to run the code,
Here the code we use is descriptive specific language
pipeline {
    agent any

    stages {
        stage('Build') {
            steps {
                echo 'Building stage'
            }
        }

        stage('Test') {
            steps {
                echo 'Testing stage'
            }
        }

        stage('Deploy to S3') {
            steps {
                echo 'Deploying'
                sh 'aws configure set aws_access_key_id AKIA274DGA7VEFQ2UGF2'
                sh 'aws configure set aws_secret_access_key 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'
                sh 'aws configure set default.region us-east-1'
                sh 'aws s3 cp ./index.html s3://www.manogna.tech'

                sh 'aws cloudfront create-invalidation --distribution-id E1B95DH1ZMXB3V --paths "/*"'
            }
        }
    }

    post {
        success {
            echo 'Hurray! success'
        }
        failure {
            echo 'Failed'
        }
    }
}
Give your access key,secret key and region and ditribution since i cannot disclose to public i actually didn't mention
Now let's create jon in jenkins
Before that we have to add webhook in the github, Go to repository---->settings--->webhook
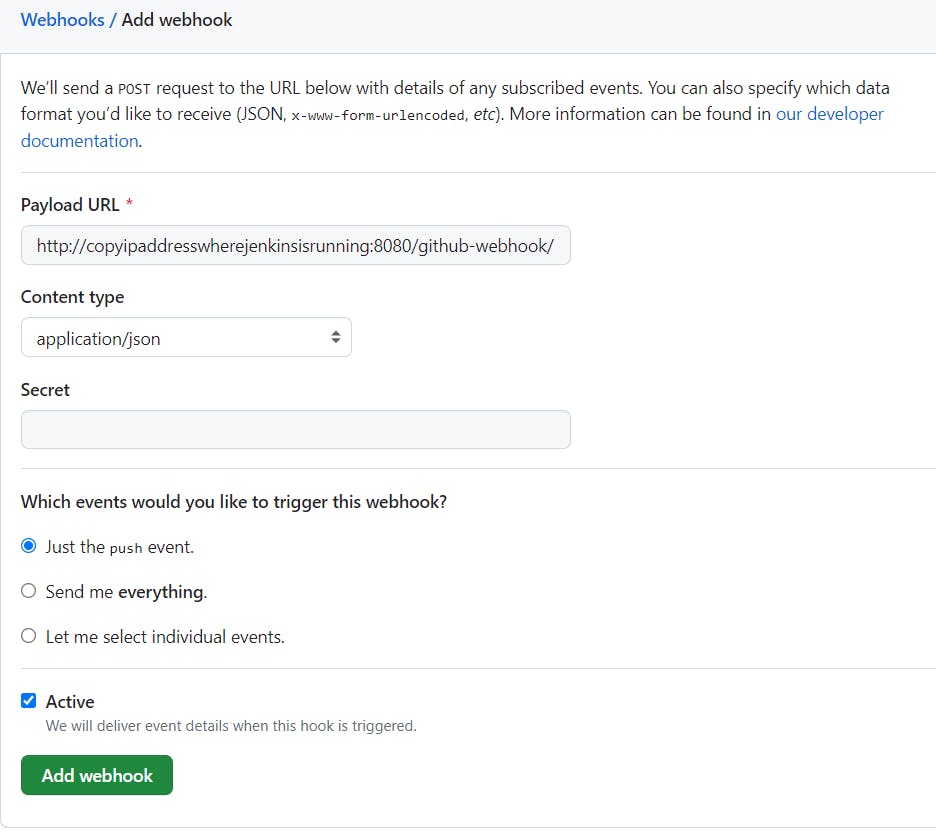
Keep everything like i mentioned,Now we have create a new job in jenkins
**Step 7:**Lastly give a name to job and choose pipeline project
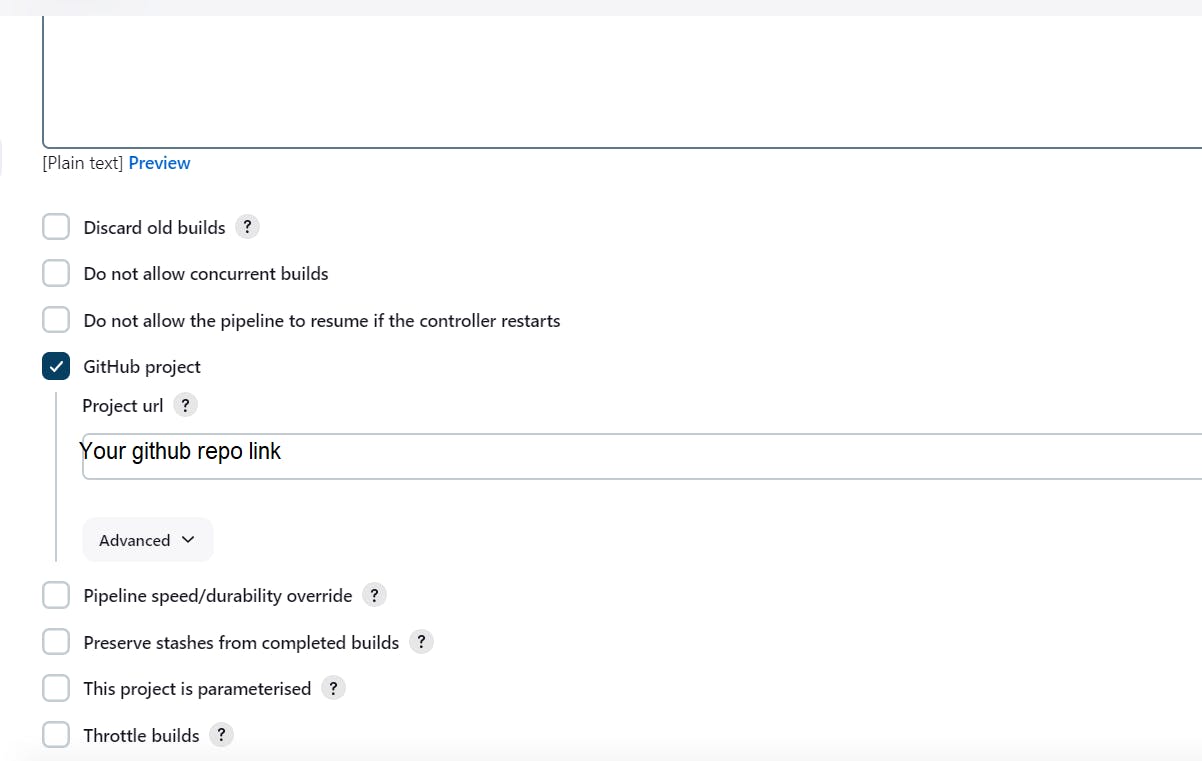
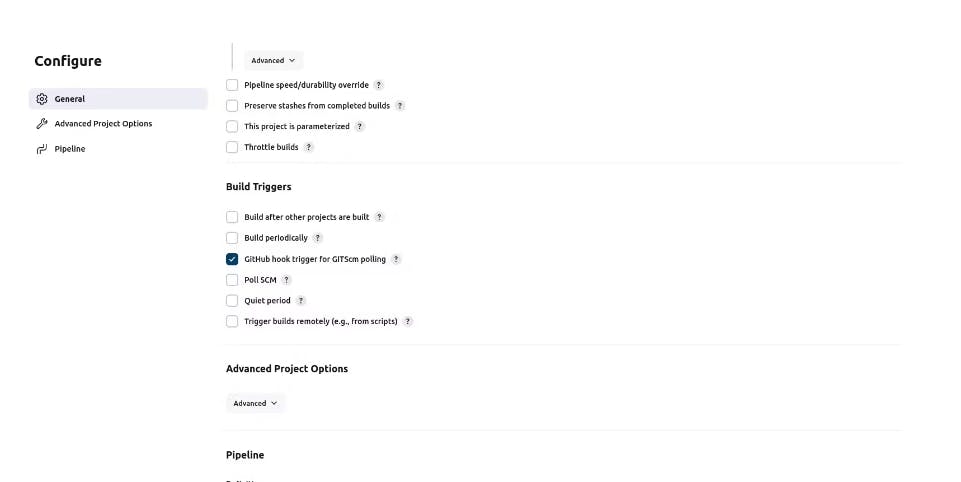
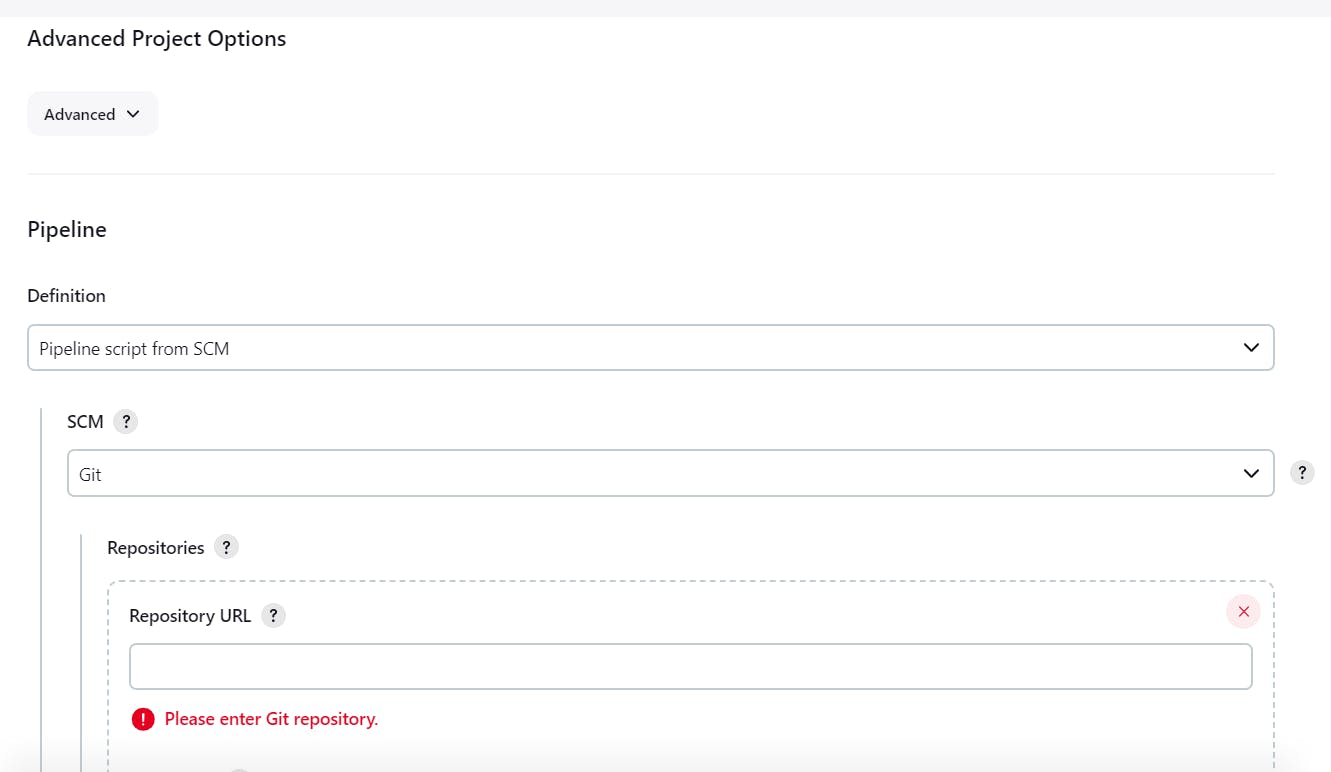
select Pipeline script from SCM, then select git and paste you repo url
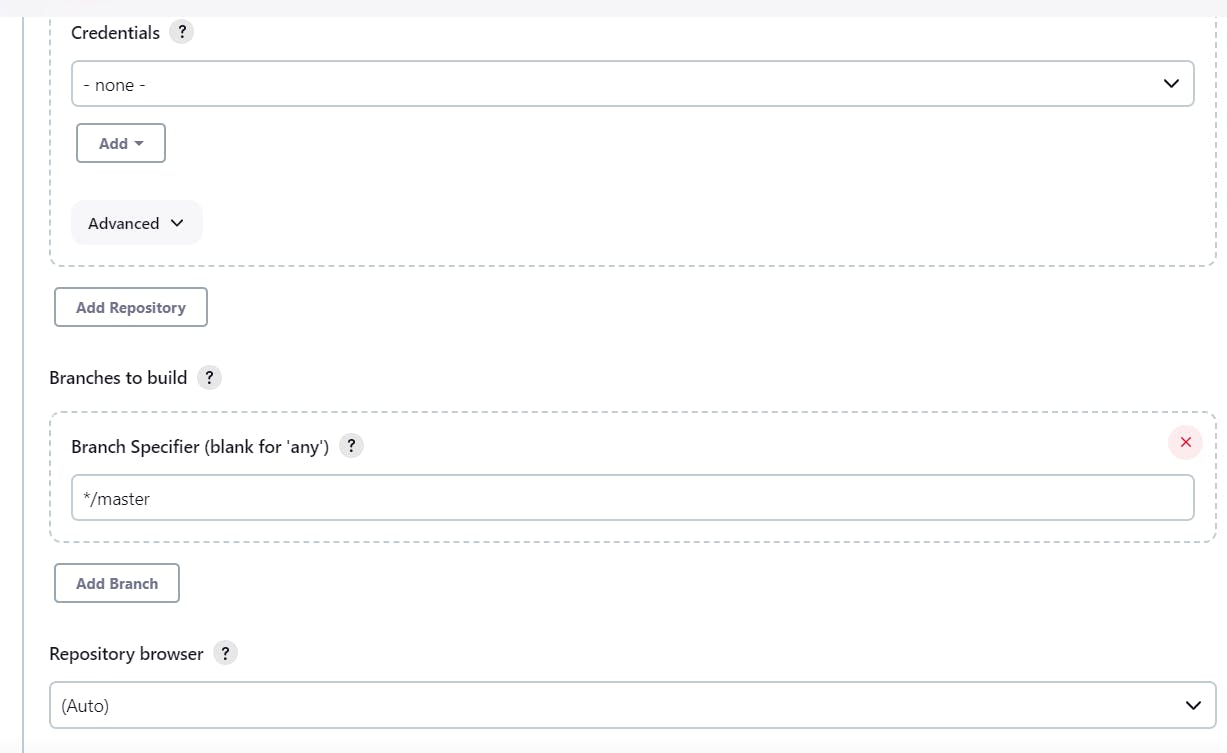
Here i used public repo so i don't need to add credentials otherwise need to do,Also since git changed master to main mention */main in Branch specifier
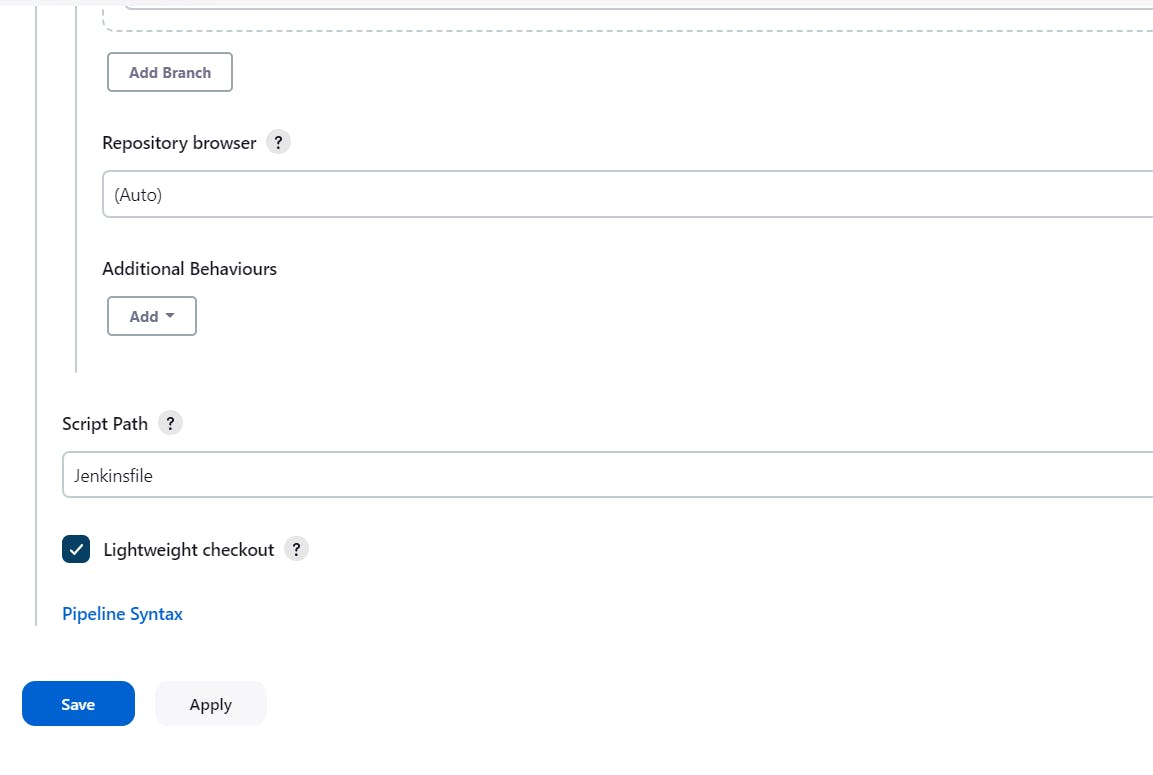
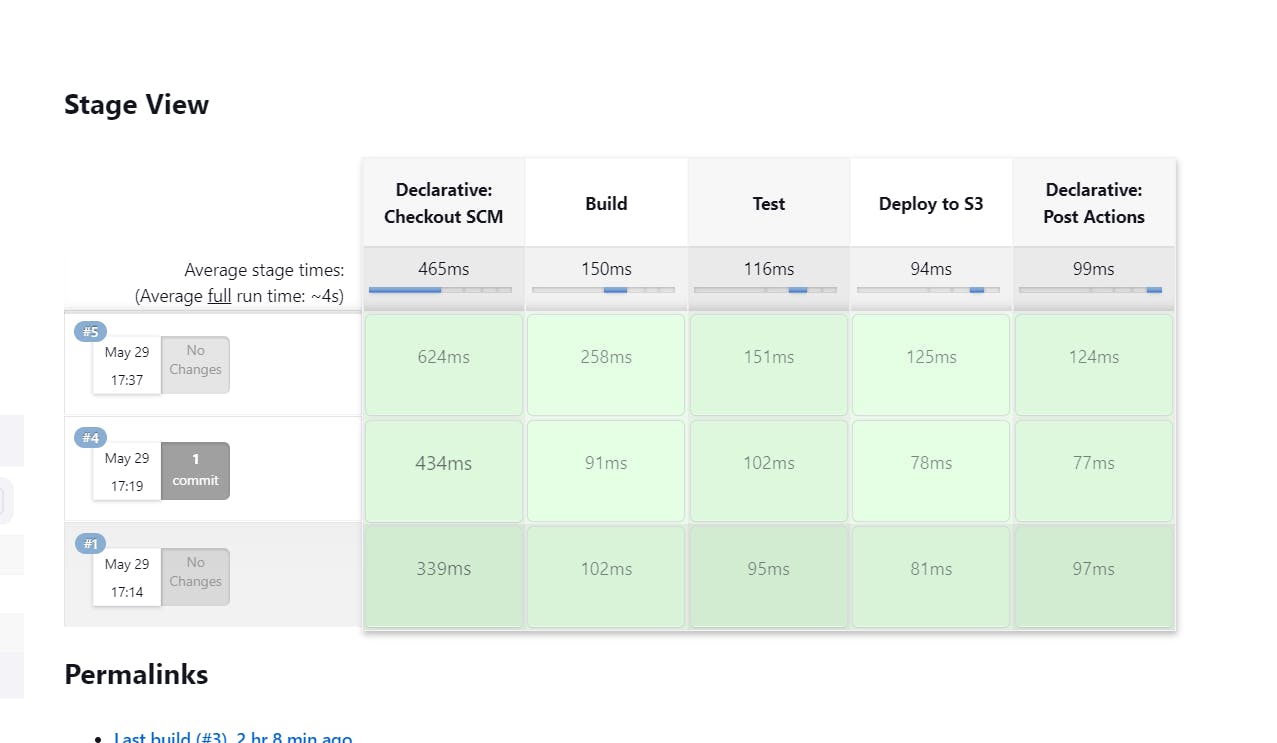
So almost we are dont now click on build now, If your build is successful you get likethis
Now everything is set and if we make any changes , since the data is cached and we get to see the chnages to the default time we set so let's make Invalidation So, what's this ? you people must be thinking
If you need to remove a file from CloudFront edge caches before it expires we use invalidation that means if we make the changes the data won't be cached and we can see the changes we made instantly

click on create invalidation
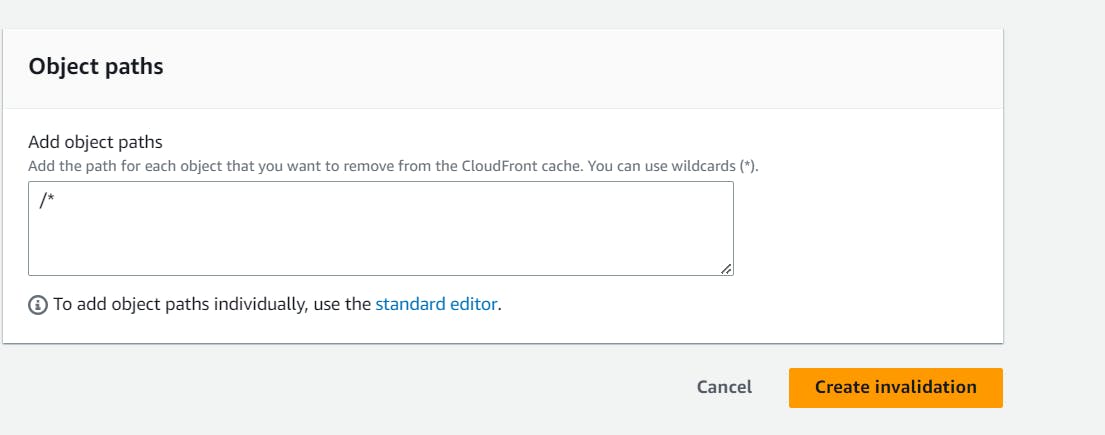
Now i'm making some changes in index.html let's see
I added chinta (my name) in index.html
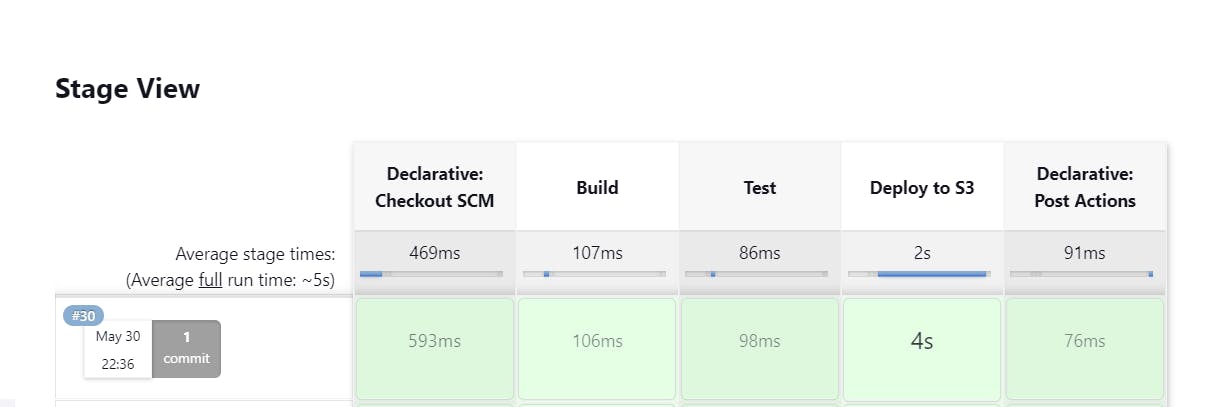
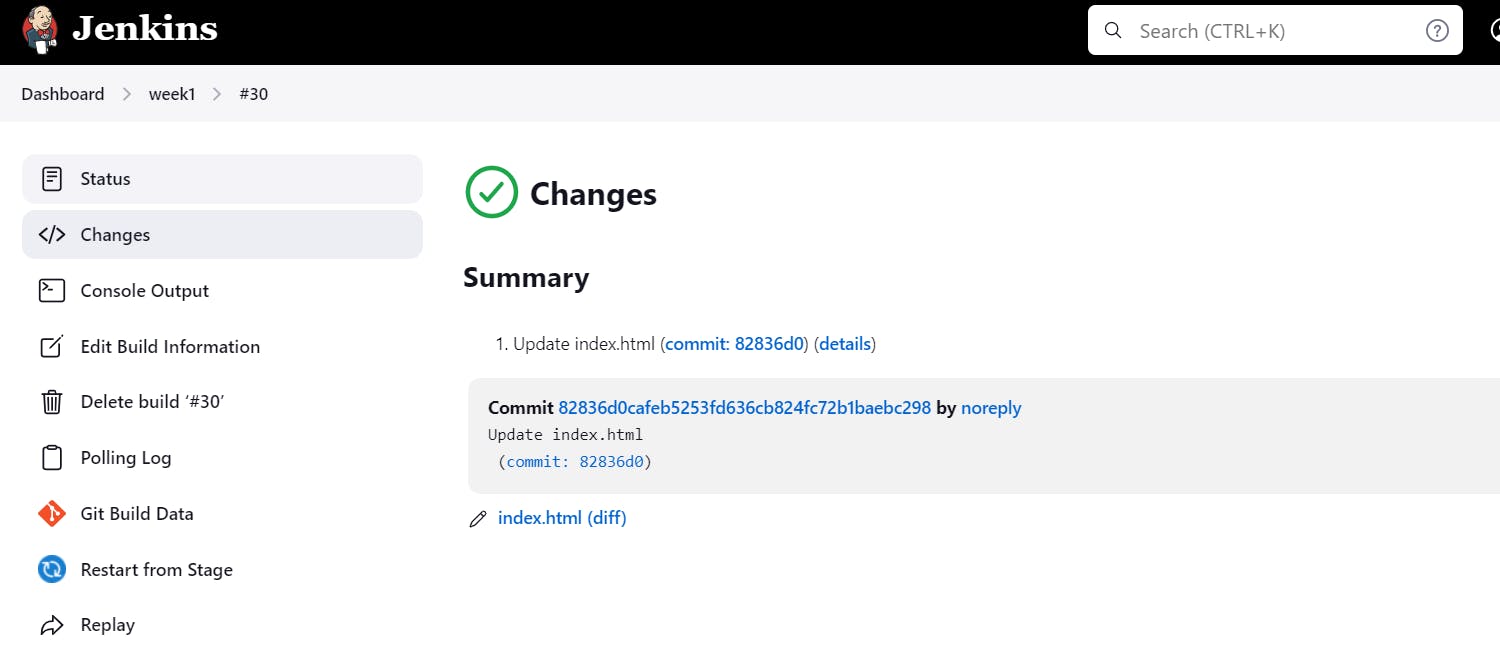
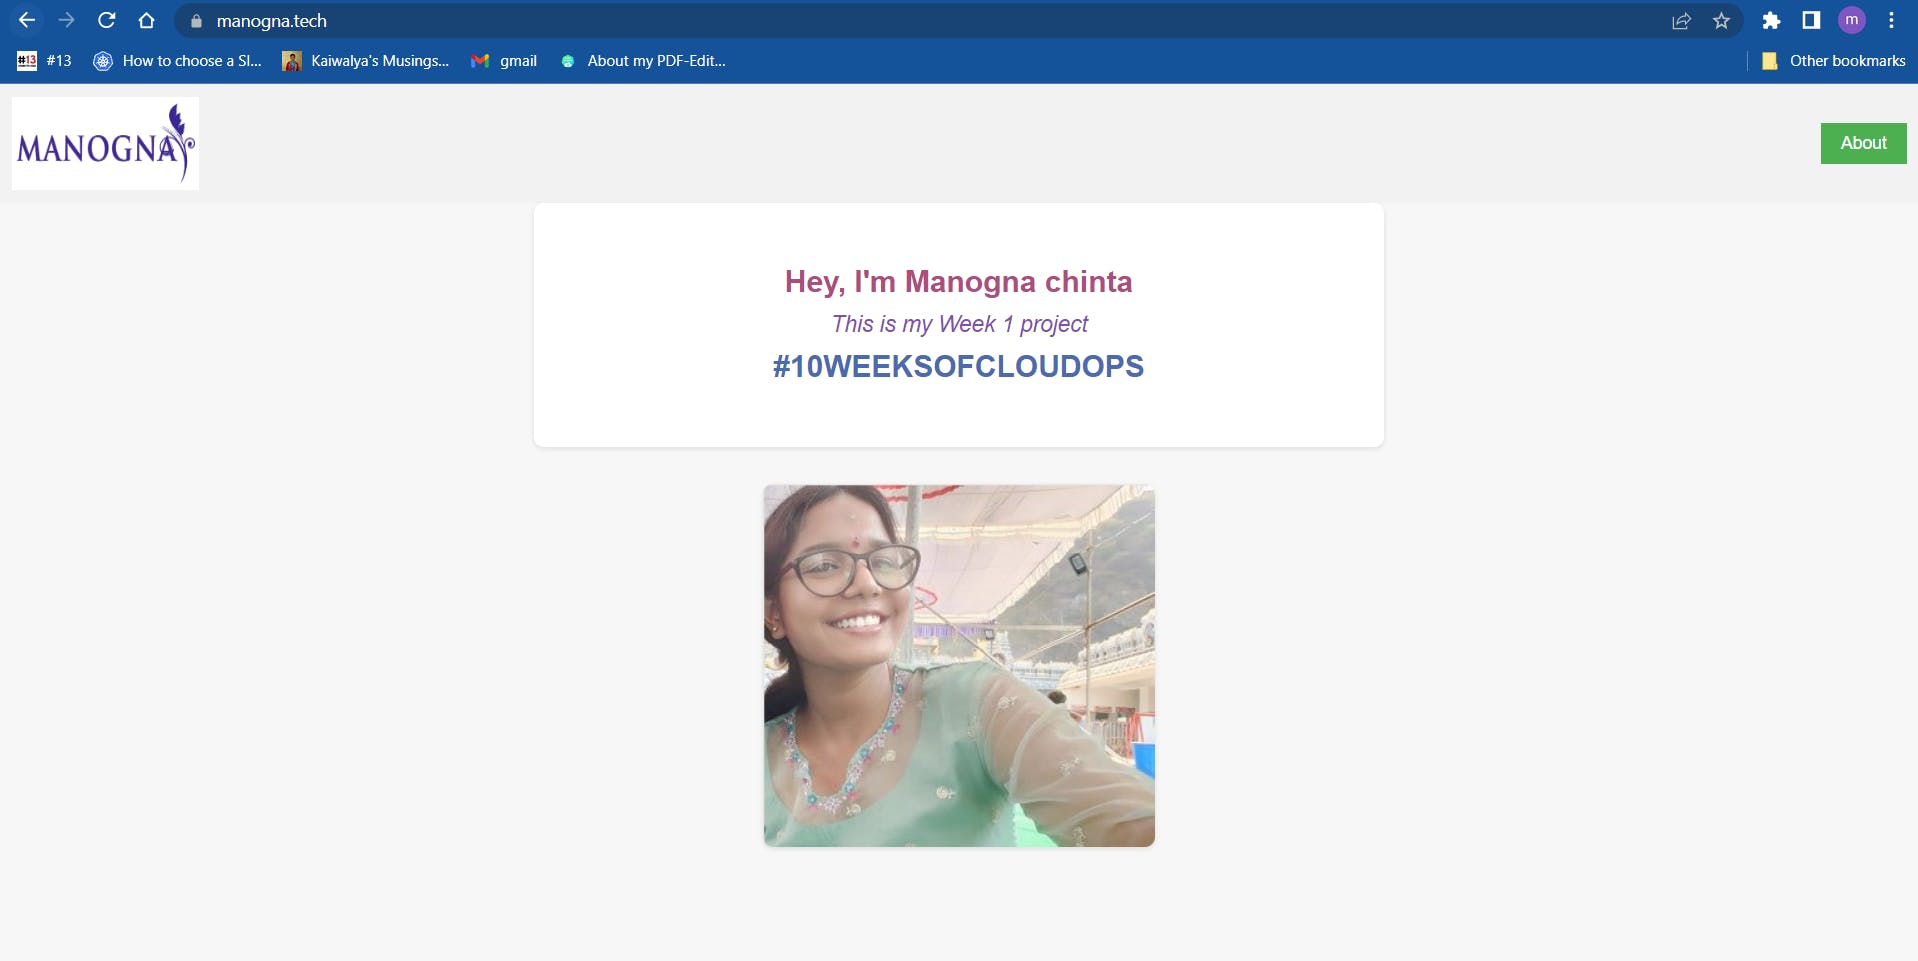
so finally we get to see the changes within seconds because i added invalidation
References:
https://docs.aws.amazon.com/AmazonS3/latest/userguide/website-hosting-cloudfront-walkthrough.html
https://docs.aws.amazon.com/AmazonS3/latest/userguide/HostingWebsiteOnS3Setup.html
Social handles:
https://twitter.com/chinta_manogna
https://www.linkedin.com/in/manogna-chinta/
Github: